Getting started
How to Build a Metal Detector Test Garden: Known Targets, Real Numbers
Quick answer
A test garden is a patch of ground you control with known targets buried at marked depths. Bury a coin, a nickel, foil, a pull tab, a nail and a ring at two inches and again at six, record the positions on paper, let the soil settle through a few rains, then write down what your own machine reads on each.
Every target ID chart published anywhere, this site included, is a description of somebody else machine in somebody else soil. A test garden replaces all of it with numbers that are true for your machine, your modes and the ground you actually hunt. It takes an afternoon to build and it is the highest value afternoon in the first season.
The reason it works is that target ID is a conductivity ordering rather than a lookup table, as the master target ID chart explains. The ordering is physics and it holds everywhere. The numbers attached to it belong to one machine on one scale in one soil type, and the only way to learn yours is to bury things you can identify and listen to what comes back.
Top pick
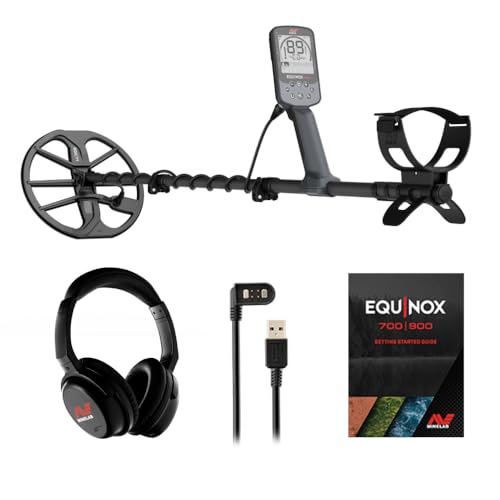
Minelab Equinox 900
Minelab publishes 119 high-resolution target IDs on the 900, so a test garden gives you finer distinctions to record than a coarser scale would.
Price was accurate when this page was compiled and changes often.
On this page
What should you bury?
Targets that represent the decisions you will actually have to make in the field. The useful pairs are the ones that read close together, because those are the digs you will get wrong.
Ten common targets buried at two inches and again at six inches will cover nearly every identification decision a coin and jewellery hunter has to make.
| Target | Bury at | What it teaches you |
|---|---|---|
| Rusty iron nail | 2 in and 6 in | What ferrous sounds like on your machine, and how badly it falses |
| Steel bottle cap | 2 in and 6 in | The classic coin impostor, and why it reads differently from two directions |
| Aluminium foil scrap | 2 in | The bottom of the non-ferrous range, and the neighbour of small gold |
| Beaver-tail pull tab | 2 in and 6 in | The single most dug piece of trash in North America |
| Square pull tab | 2 in | A different aluminium mass, and where it sits against a zinc cent |
| US nickel | 2 in and 6 in | A narrow reliable slot that anchors the middle of your scale |
| Zinc cent | 2 in and 6 in | Where the modern cent sits against the tabs |
| Copper cent | 2 in and 6 in | The high conductor end, and its overlap with a silver dime |
| Clad quarter | 2 in and 6 in | Your reference for a normal coin signal at depth |
| Cheap gold-coloured ring | 2 in and 6 in | Why ring size moves the number more than metal does |
| A silver coin if you own one | 6 in | The target you are actually hoping for, at a depth that matters |
Use targets you can identify with certainty and are willing to leave in the ground. Mark positions on paper rather than trusting memory.
How do you build it so the numbers mean something?
- Pick ground you control. Your own garden or ground you have written permission to dig. Choose a patch you will not need to mow aggressively or dig up for another reason.
- Check for buried services first. Contact the appropriate utility location service before disturbing ground, and keep well away from meters, drops and anything running to an outbuilding.
- Lay out a line and a plan. Two parallel rows, shallow targets in one and deep in the other, with at least a couple of feet between targets so their fields do not overlap.
- Bury at measured depths. Two inches and six inches, measured rather than guessed, with each coin lying flat. Note which way up and which orientation, because both change the reading.
- Record the map on paper. A sketch with distances from two fixed points. In two seasons you will not remember, and an unmarked test garden is just litter.
- Let the ground settle. Freshly disturbed soil reads differently from undisturbed soil, so leave it through a few good rains before you trust anything it tells you.
- Sweep and write it down. Every target, in every mode you actually use, at a normal sweep speed. Record the ID, the tone and whether it held from two directions.
- Repeat after changes. After a firmware update, after a coil change, and in both wet and dry conditions. The differences are the most useful part of the exercise.
What will surprise you about the results?
How much the numbers move. A clad quarter that reads one number at two inches commonly reads lower and less steadily at six, because the machine has less signal to work with. A coin standing on edge can drop ten points or vanish, which is why orientation is worth recording. Corroded targets read differently from clean ones, and a rusted cap will throw a respectable coin number on one sweep and iron on the next.
The other surprise is the overlap. Once you have your own figures written down, you will see that the gold ring and the square tab genuinely sit on top of each other on your machine, exactly as the target ID chart warns. That is not a defect. It is the reason people who dig gold also dig tabs, and knowing it in your own numbers is what stops you notching away your best targets.
How does a test garden change what you do in the field?
It converts a vague signal into a decision. When you know that your machine reads a silver dime at a particular number at six inches in your soil, a signal at that number with that tone is worth cutting turf for even when it is faint. It also tells you when the machine is not behaving: if the garden targets read differently from last season with no change in conditions, check the batteries and the coil before blaming the ground.
It is also the honest way to compare coils. Run the same buried targets with the stock coil and with a smaller one such as the Minelab EQX 06 Coil (6 inch) or the Coiltek 10 by 5 NOX Search Coil, and you will see the separation difference the coil size chart describes, measured in your own dirt. For depth expectations before you start, the detection depth calculator gives a range to check your results against.
What does a test garden not tell you?
It does not tell you how your machine behaves in ground unlike your own. Soil mineralisation varies enormously over short distances, and a garden built in mild loam says little about red clay or black sand. It also cannot reproduce the masking effect of a site full of iron, because your targets are spaced out deliberately. Treat it as a calibration of your machine rather than a simulation of a real site.
Finally, it will not settle arguments about absolute depth capability, because a buried target in disturbed ground is never quite the same as one that has sat undisturbed for a century. Published depth claims and realistic ranges are set out in the depth chart, and the honest summary is that your garden tells you about relative changes, not about records.
Sources
- Minelab Equinox 700 and 900 instruction manual
- Minelab EQX 06 and Coiltek NOX coil product specifications
- Published codes of practice from national detecting associations
Frequently asked questions
How deep should I bury test targets?
Two inches and six inches covers most of what you need. The shallow set teaches you clean target ID values and the deep set teaches you how those values degrade, which is the part that matters in the field. Going deeper than about eight inches usually just produces silence on smaller targets, which is informative once but not worth building the whole garden around.
Why do I have to wait before testing?
Because freshly disturbed soil reads differently from undisturbed soil. Loose, aerated ground around a target flatters the machine and gives you numbers you will not reproduce in the field. Leaving the garden through a few good rains lets the soil compact and the halo effects begin to develop, so the readings start to resemble what a long buried target actually gives you.
Should I rebuild the garden after a firmware update?
You do not need to rebuild it, but you should re-walk it. Processing changes can move target ID values and alter how stable they are, which is exactly the sort of thing you want to discover in your own garden rather than over an uncertain signal on a permission. Re-walk it after coil changes too, and in both wet and dry conditions.
Can I use a test garden to compare two detectors?
For relative behaviour, yes, and it is the fairest comparison most people can run. You can see which machine separates two close targets better and which holds an ID at depth. What you cannot do is turn it into a published depth claim, because one garden in one soil type with disturbed ground is not a controlled test of anything beyond your own conditions.
What if I do not have ground to bury things in?
Use containers of your own soil, or ask permission to build the garden at a club site or on a friend land. Laying targets on the surface and sweeping over them is better than nothing for learning tones, but it will not teach you anything about depth or about how soil changes a reading, which is most of the value of the exercise.
Researched, not professional advice. This page is compiled from published specifications, manuals and owner-review consensus, not hands-on testing. Target ID numbers, depth figures and settings vary with soil chemistry, moisture, target size, depth, orientation and firmware version, so treat every figure here as a starting point and verify it against your own machine's manual and your own ground. As an Amazon Associate we earn from qualifying purchases.